A remote morse key
A simple DIY project for a remote cw key connected to your Flex Rig (actually it can be any other rig).
On the remote side it uses and Arduino Uno board and a cheap HanRun Enc28J60 ethernet shield. On the local side it uses a key (better a keyer) connected to a serial port of your pc. Probably you need also to use a USB to RS232 adapter to connect it to new generation computers.
You don't need to have an active computer on the remote side, just your router, the Flex and the Arduino board.
03/03/2020 - New firmware for W5100 Ethernet boards - Many thanks to Pierre, KA2QPG
Pierre KA2QPG, developed a new version of the Arduino firmware. Now you can use a more common and cheap Arduino Ethernet Shield based on a W5100 chip. This helps a
lot in developing the project.
Thank you very much Pierre!
Download the sketch for here
How it works
REMOTE SIDE
On the remote side the Arduino Uno is connected to the same network of the FlexRig. The ethernet board listen to UDP packets caming from the port number 6000. These packets are sent from the
client pc where is running SSDR and where is connected the key/keyer.
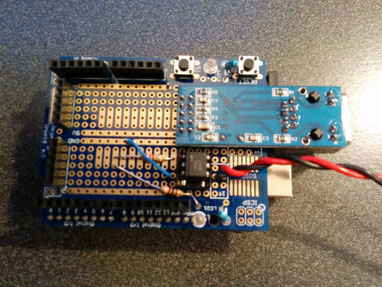
The Arduino board is also connected to the accessory port of the FlexRig, and using the opto-isolator 4n35, it can close the 4 and 10 pins. In this way it safely keys your rig.
The code in Arduino implements an UDP packet analyzer so when it receives an L1 command it keys the rig and when it receives an L0 command it unkeys the
rig.
You can see a picture below.
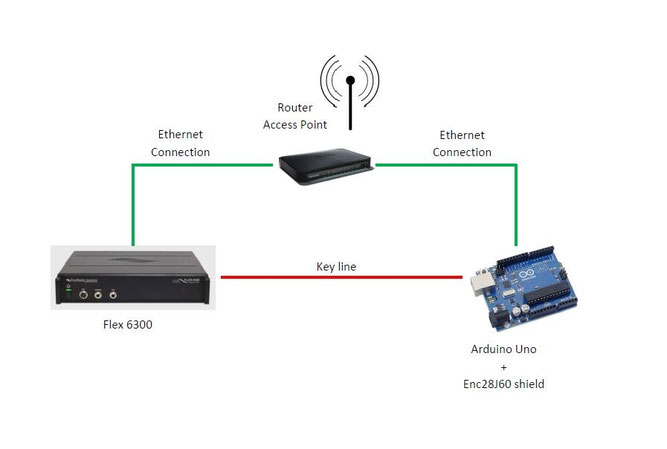
LOCAL SIDE
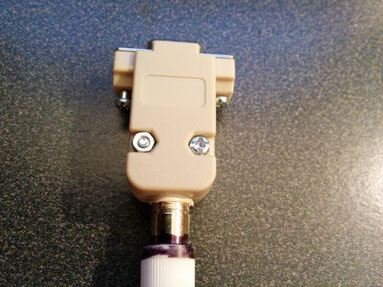
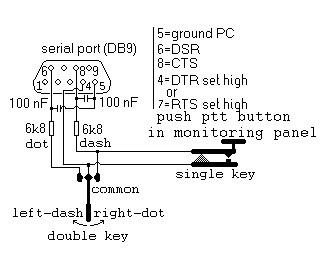
On the local side you should have a pc that can be connected to you Flex Rig and can run SSDR. You have to connect your keyer to a serial port of your pc using an USB to RS232 adapter. You need also to build a DB9 connector using the following connection schema.
Next you have to run a small program that can read the signals coming from the com port and send L1/L0 commands via UDP protocol. To do this, I wrote a small utility you can download from the link below.
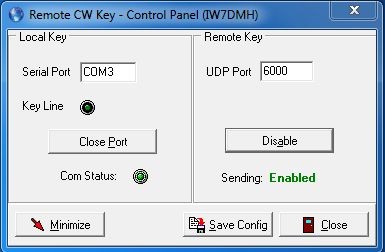
Simply select the com port used by your local keyer and set remote (UDP) key port to 6000. You can save this config so it can be recalled the next time you'll use the program.
How to build the remote-key board
Wire the Enc28J60 shield to the Arduino board floowing the schema below:
- SO -> Arduino pin 12
- SI -> Arduino pin 11
- SCK -> Arduino pin 13
- CS -> Arduino pin 8
- VCC -> Arduino 3V3 pin <---- be careful!!! it is 3.3V
- GND -> Arduino Gnd pin
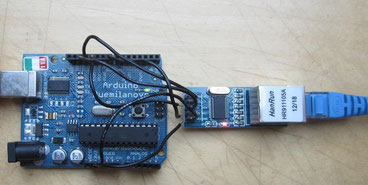
Next wire the opto-isolator 4n35 as shown below:

Now you can program your arduino using the sketch below.
Please refer to the Arduino Due Controller pages to see how you can install the additional libraries provided with the sketch.
Download
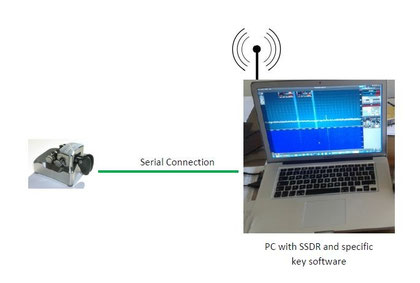
Look at the key in action!

A building experience
Lee, W9OY, built with success the Remote Morse Key.
Read his building experience and usage feedbacks on his blog http://sdr-w9oy.blogspot.it/2015/09/remote-cw-part-due.html
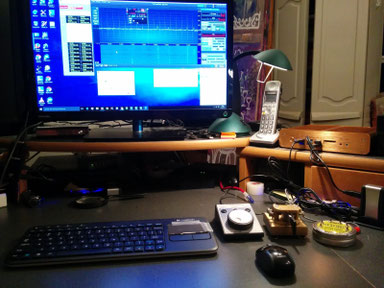
Here are some pictures of Lee remote CW setup. You can see N3ZN SL-1 paddle and a K1EL K12 keyer in a Altoids tin. The keyer drives the Remote CW program in my computer via a serial port in
the following fashion
Paddle > Keyer > serial port to computer > Remote CW program > ......Ethernet/VPN
Internet...... > Arduino > 6500 in the shack.